A couple of days ago I added SSL to my website (The Shirt List) which is hosted at Synthesis so if you want to add SSL to your website, be sure to check out that post on how to add SSL to website with Let’s Encrypt and Synthesis. Yesterday, I tried it again with a website (Best T-Shirts Ever) that I have hosted on Dreamhost (Affiliate Link – $50 off shared hosting). It was easy too but just in case you are having trouble here is a guide on how to add SSL to a website with Let’s Encrypt and Dreamhost.

Dreamhost
Dreamhost is the web hosting company that deadhippo.com is hosted on. I have been using Dreamhost for various websites since May 2008 and they have been pretty cool. I recommend them if you have a small low traffic website(s). It’s a grat place to start new projects, too.
Let’s Encrypt
Let’s Encrypt is a free, automated, and open certificate authority (CA), run for the public’s benefit. It is a service provided by the Internet Security Research Group (ISRG).
We give people the digital certificates they need in order to enable HTTPS (SSL/TLS) for websites, for free, in the most user-friendly way we can. We do this because we want to create a more secure and privacy-respecting Web.
They add that little green padlock in the URL bar to add an air of authenticity and security. Google also said that they would favor sites with SSL from this year and that is really why I wanted it because I don’t have a store or even collect any passwords.
The Process of Using Let’s Encrypt and Dreamhost
Step 1 – Flip the HTTPS switch
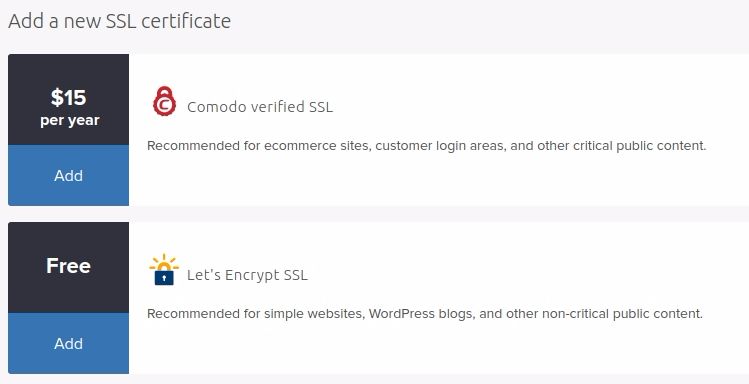
The first thing you need to do is log in to your Dreamhost control panel and navigate to Manage Domains. You should see a list of domains that you have registered with Dreamhost. (See image below for deadhippo.com.) Click on https Off.

Then select Let’s Encrypt SSL.
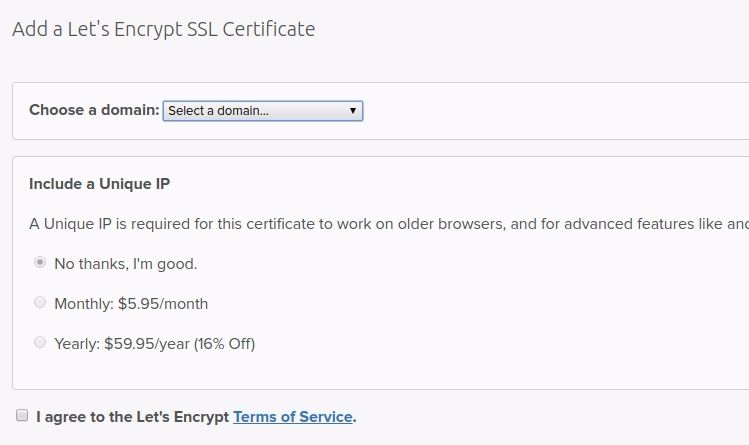
Then choose a domain from the dropdown and selects “No, thanks. I’m good, agree to the terms of service, and click Add Now.
This is the message that you should get:
Success!
Secure Hosting set up for https://deadhippo.com/!
Please note, however, that professionally signed certificates from Let’s Encrypt take a while to get set up, so we’ve put a self-signed certificate up in the mean time.
This self-signed certificate secure, but visitors’ browsers will give them a warning until the certificate from Let’s Encrypt is ready to go.
We did not add a Unique IP to your domain, so you may experience some compatibility issues with older web browsers, such as Internet Explorer on Windows XP. You can add a Unique IP at any point through the Manage Domains page.
Thanks for choosing DreamHost,
The Happy DreamHost Secure Service Adding Robot!
You should get an email fairly quickly from Dreamhost telling you that it’s ready.
Step 2 – Preview and fix
They said “Once the SSL has been installed, you can preview the site under HTTPS to make sure there are no layout issues. If there will be layout issues, you can manually fix it or install the SSL Insecure Content fixer to help fix the issue. ”
I didn’t have any layout issues but the green padlock disappeared very quickly. I viewed the source code and found that the images in the posts were still using HTTP rather than https so I used a plugin (Better Search Replace) to search and replace all http://www.theshirtlist.com with https://www.theshirtlist.com.
The issue persisted but the theme on the homepage also had some HTTP links hard coded in so I updated them manually. That fixed the homepage but the green padlock was still appearing on individual posts and I was able to narrow this down to the Adrotate and a BUYSELLADS widgets. They were also serving HTTP images and when I updated the image links, the problem was solved.
You can use Why No Padlock? to find out why your padlock is disappearing but I found that it doesn’t work for popups.
Step 3 – General Settings
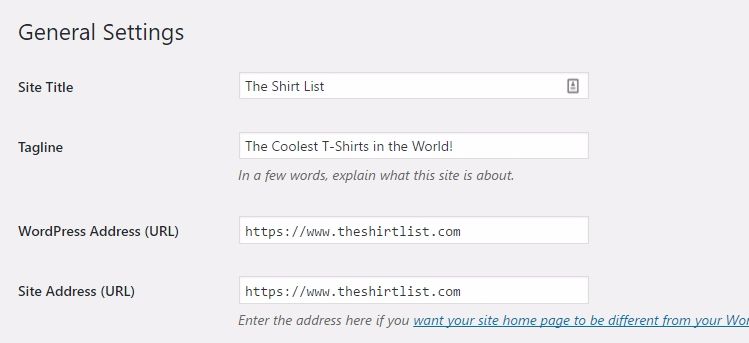
You’ll need to go to the general settings in your WordPress control panel and change HTTP to https.
Step 4 – Redirect
There are several ways to do redirects from HTTP to https but I recommend adding the following code to your .htaccess file. You’ll need to edit the file via FTP.
RewriteEngine On
RewriteCond %{HTTPS} off
RewriteRule ^(.*)$ https://%{HTTP_HOST}%{REQUEST_URI} [L,R=301]
If you have an existing .htaccess file:
- Do not duplicate
RewriteEngine On. - Make sure the lines beginning
RewriteCondandRewriteRuleimmediately follow the already-existingRewriteEngine On.
Step 5 – Google Search Console
When the redirect is implemented Synthesis will notify you. Then add your https site to Google Search Console. The https and HTTP sites are seen as different websites but it seems that you can’t treat them as a site moving. Don’t forget to add a sitemap and other things as if you are adding a new site to Google Search Console for the first time. Because you are.